I am guilty and I know it. I love clothes. I love color, texture, pattern and silhouette.
Heck - this is why I am blogging about it. I truly respect design, innovation, and love getting new clothes. But over the years I see the impact that fast fashion and just fashion is making on the environment. I am not going to go in to how many gallons of water are used to get the perfect wash on your selvage denim jeans, nor am I going to preach about labor costs and a fair wage. But think for one minuet what NYC wastes in clothes TRY 220 million pounds of wasted clothes OR…… ( I am re-posting these facts from a great IG )
220 Million pounds of clothing is = 440 Statues of Liberty
220 Million pounds of clothing is = 4 Intredips
CRAZY right ! So I decided that while I love clothes and I want to inspire you all to shop, I can also show you all how to be a little creative and remake, up-cycle, or rework some clothes to make them on trend with out always having to go out and buy something new.
So with Coachella just wrapping up, and Tie dye being the new comeback in fashion trends. I thought it would be great to show you all how easy it is to create a fun pattern on several types of tops.
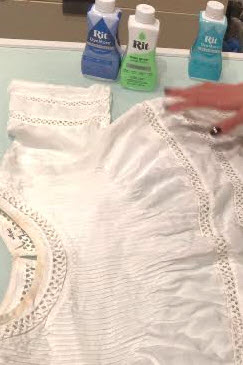
These are all white tops that I was about to probably donate to places like Beacons closet, Crossroads, Goodwill and a favorite Housing works all will take donations and are just a walk away from my apt.
First - I went to the most amazing place Manhattan Wardrobe supply and got Rit dye I prefer the liquid. I also decided to try out the neon and the dye for synthetics.
I got 3 buckets and then thought about the placement of where I wanted to try out the patterns. Note the last thing you want it a ring around your Boob or some other weird spot - just being honest.
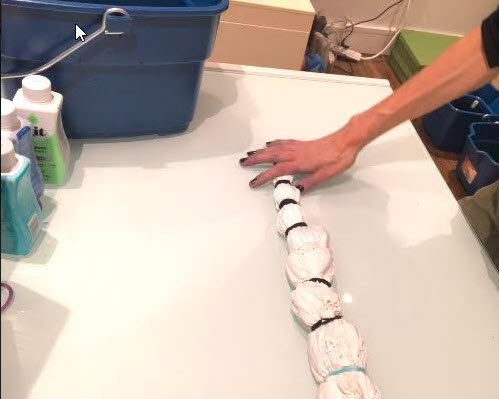
I took hair bands and then folded and ironed in some cases the creases that would be the “resist” as in the Dye would not go there.
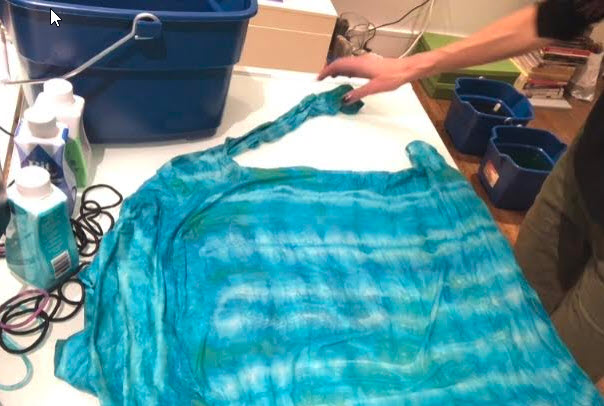
I boiled the water and followed the directions. Adding in about 1/2 the bottle to the boiling hot water -do use caution. Next I tried 2 techniques one where you wet the garment before the other where you just submerge it dry. Giving you two different results. The Pre wet garment makes the colors blend more and bleed into each other which can be nice for a more gentle ombre effect. or for colors that are in the same family so the bleeding looks nice and not like an unattractive mix.
The dry garment dipped into the dye will maintain that crisper white edge that I like and wanted. It makes the pattern show up more and is what I was going for.
After trying to keep the hot water a consistent Really Hot temperature, I timed out 10 - 30 min.
I used a wooden spatula to make sure the clothes were submerged and then checked them.
After about 20 min I pulled them out and too them to my kitchen to rinse with cold water until the water runs clear.
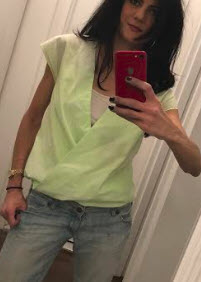
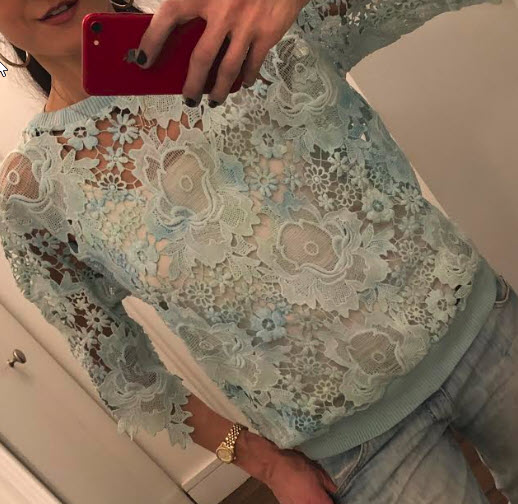
I then removed the elastic bands and was very excited with the results. It is 100% worth it to plan your design. A neat other result was I go two tones with out trying. On the silk blouse it is both turquoise and has spots of green. The back panel I folded and ironed in creases and it looks great. While on the front I thought about how I would want the ring placement to be. It came out fantastic. I now actually have a shirt I would wear. The other tops came out great too. The lace shirt was put in the dye bath wet and came out almost pastel hues. Updating what was a shirt I have worn for 2 years now at least, and the other white tops took to the neon die really well.
So try this out - and share with me what you tie dyed. I would love to share your ideas.
To see the video do to my Youtube page KristinPaquette and see me in action. And if you really like it comment what you want to see next and subscribe.